Below are photos of the build in order of date with the latest first.
Explanations are below the pictures:

7/3/12-Unfortunately the original radiator soon started leaking, so I have replaced it with a much better one from
Radtec as you can see above.

4/9/11-Had a brilliant day at Goodwood after Club Elite kindly allowed me to join their trackday.
The Seven perfomed brilliantly with stable oil pressure and water temperature, and no need to top up the
oil all day! I've fitted Yokohama A021r tyres and they grip amazingly well.
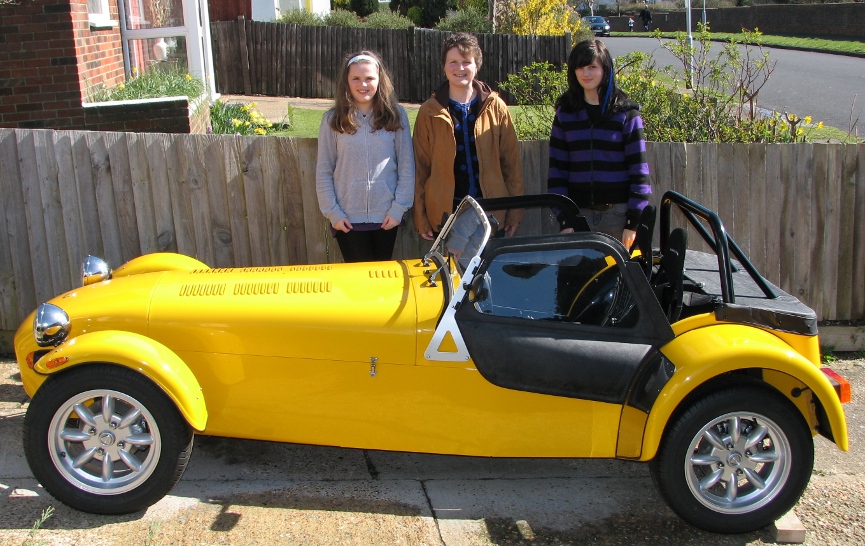
19/3/11-After adjusting the clutch pedal stop again, I was able to drive the finished car onto the drive for
a family photo session. Soon after Barry came past in his yellow Seven, so we had a pair outside.
6/3/11-Good news! Today, after fitting the silencer, I finally started the engine and ran it up to
working temperature. The clutch is dragging a bit, and we had to add extra coolant as the air in the system
bled, but otherwise all went well. The fan worked and there was good oil pressure, and so far no sign of leaks.

5/3/11-Here is a close up of the front of the wing. The stainless guard was fitted a few days ago as it has to be
done before the wing goes on.
5/3/11-Fitting the rear wings is quite tricky even though the bolts holes are pre-drilled. The nearside wing lined
up alright, but most of the holes on the offside needed to be adjusted. I found bonding the beading strip to the wing
edge and punching the holes for the bolts before trying to put the wings on worked well.
20/2/10-I'm looking pleased here, because I have just finished fitting the front wings and the indicator repeaters.
The wings are straight forward to fit, but any mistake with measuring or with the drill would show up very badly!
The repeater wiring is a pain, because it has to travel down a thin tube and a gromit is needed where the cables enter
and leave the tube. The exit gromit is very difficult to fit, and wasn't supplied with the kit.

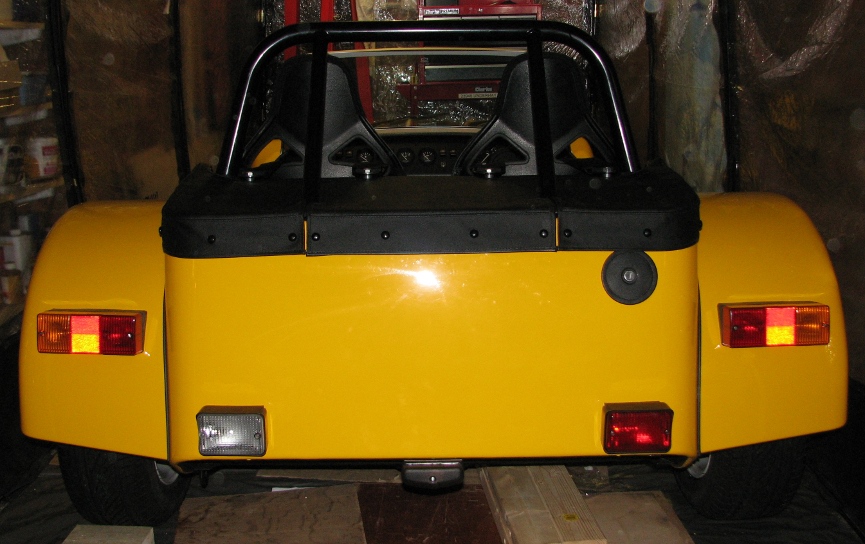
6/2/10-Rear view of boot cover. It is well made, and has velcro retained flaps around the roll bar
supports. Much better designed than the Westfield I made 20 years ago.
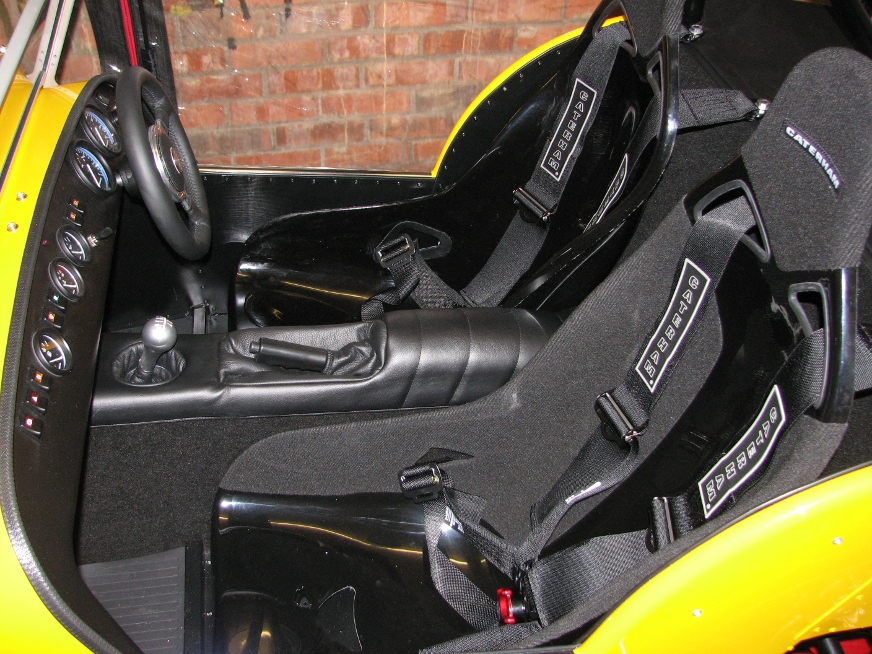
6/2/10-Here is a picture of the finished interior. The seats have been fitted for a week, but
I couldn't fit the harnesses fully until the boot cover was fitted. I you look closely you can
see that the driver seat is bare glass fibre, and the passenger seat has carpet trim. I fitted
the seat with the carpet, but found the carpet was like velcro and I couldn't move around in the
seat at all. My brother has a Fisher Fury with these style seats in bare glass fibre and I have
found them much more comfortable, so I spent two evenings scraping off the carpet and contact
adhesive. While the seat was out I moved the rails to get another inch of legroom, and trimmed
seat adjuster handle which was ridiculously long.
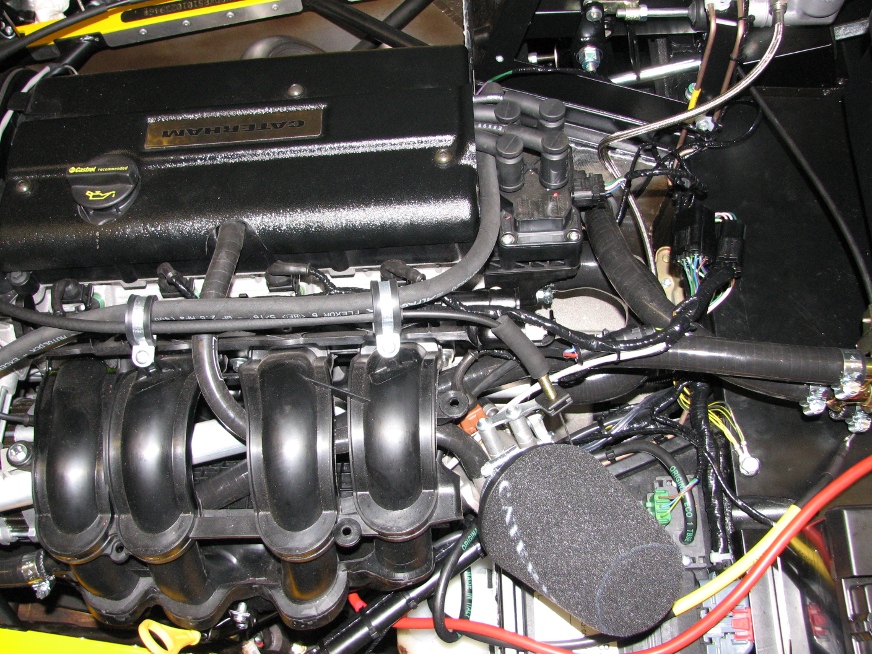
23/1/10-This view shows the rear part of the engine bay. The water hoses, fuel pipe and throttle
cable are all fitted. I have finally tidied the loom where it emerges from the tunnel and joins
the engine loom. This was very difficult, in the manual all the connectors are tucked into the
transmission tunnnel to hide them, but I have heard of cars failing the IVA test because the loom
was too close to the engine and gearbox. This doesn't look as tidy, but should be safer.
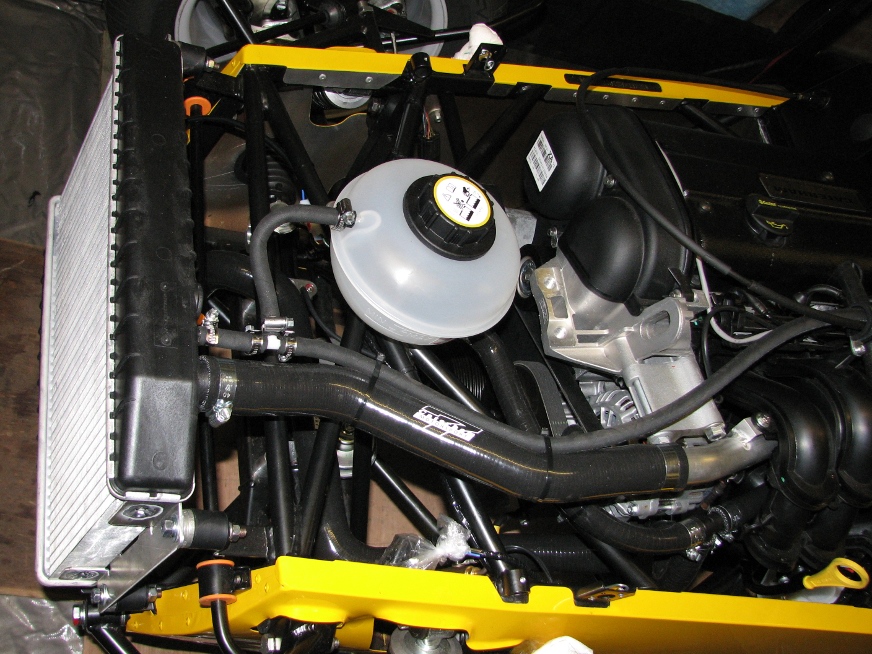
23/1/10-I have now fitted the entire cooling system after having to wait for the missing
bleed hose to be supplied. Here you can see the radiator, expansion tank and the hoses. I
haven't had a chance to fill the system with antifreeze yet.

9/1/10-Today I fitted the exhaust manifold pipes. There isn't much room to get them in, but they fit very nicely.
Next I fitted the catalyst. Getting the retaining springs on was a nightmare, but I found compressing the springs
using cable ties made it a lot less risky.

2/1/10-This view of the front of the engine was taken after we had the engine mount and gearbox bolts in
place. If you look closely you can see the left hand engine mount bolt is very high. This is because I
hadn't been suppiled with the correct shorter bolt for this side. I have temporarily used the wrong bolt to
locate the mount.
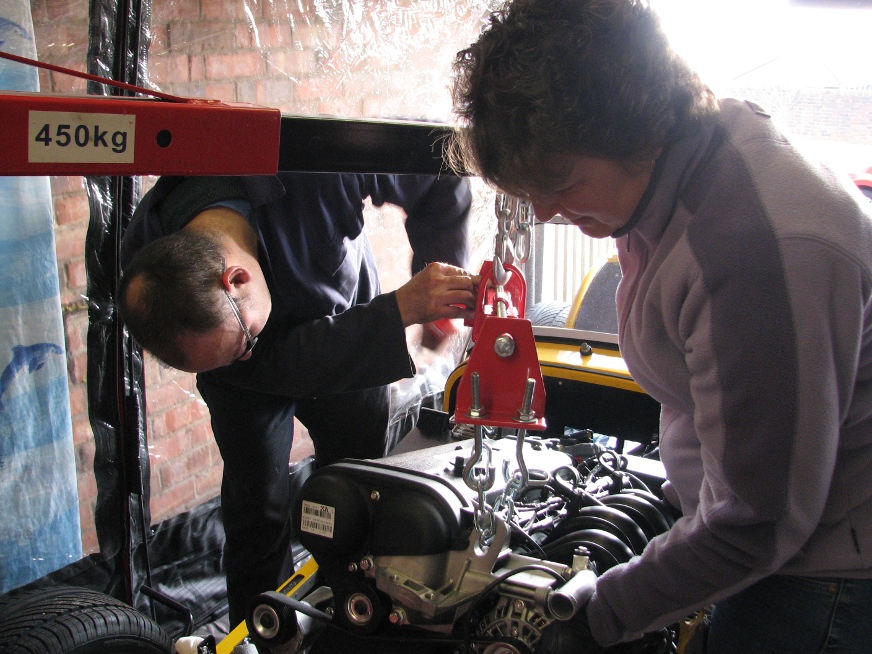
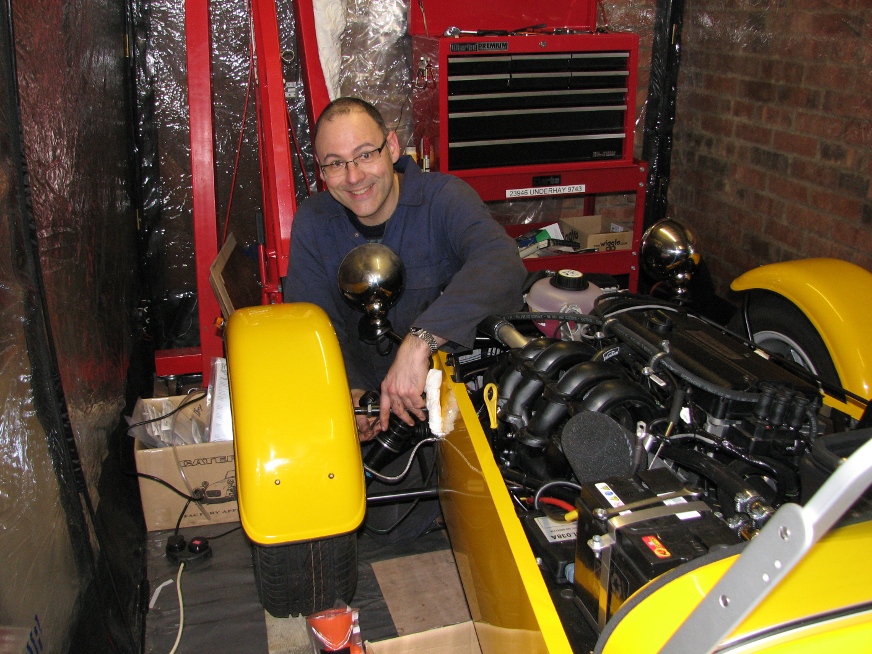
2/1/10-The big day has arrived, we are ready to install to engine and gearbox. I had worried that there wasn't
enough height in the air chamber, but that wasn't a problem. Instead we had trouble with the legs being too
wide to go between the front wheels! I had to use spacers on the hubs. There was no way I could have installed
the engine on my own. I'd heard the clearances were tight, but didn't realise quite how tight! Here Alison is
helping me check the positioning. Lizzy also helped out a lot, and was also official photographer for the day.
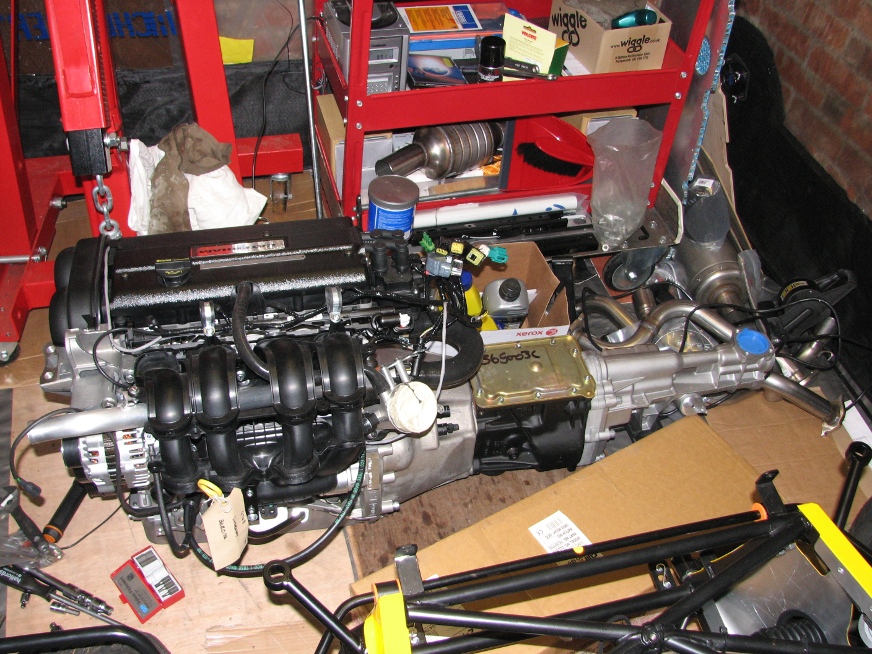
1/1/10-This photo shows the engine and gearbox assembly ready to install. As you can see there is
very little space with the car pushed back into the garage for the night. The engine crane is beside
the tool trolley where I had stored the engine. Up until today, I had to keep the engine crane
outside covered with a tarpauline.

1/1/10-Here the car has its wheels on for the first time. With our sloping driveway and small
garage, I had to find a way to safely roll the car out of the garage to make room for the crane
that I will use to install the engine. I bought some timber and screwed the pieces together to make
ramps, and rested the ends on my old wheel ramps. The ramps are horizontal and allow me to easily
roll the car in and out by hand. Note the clamped wheel chock to make sure I don't overshoot.
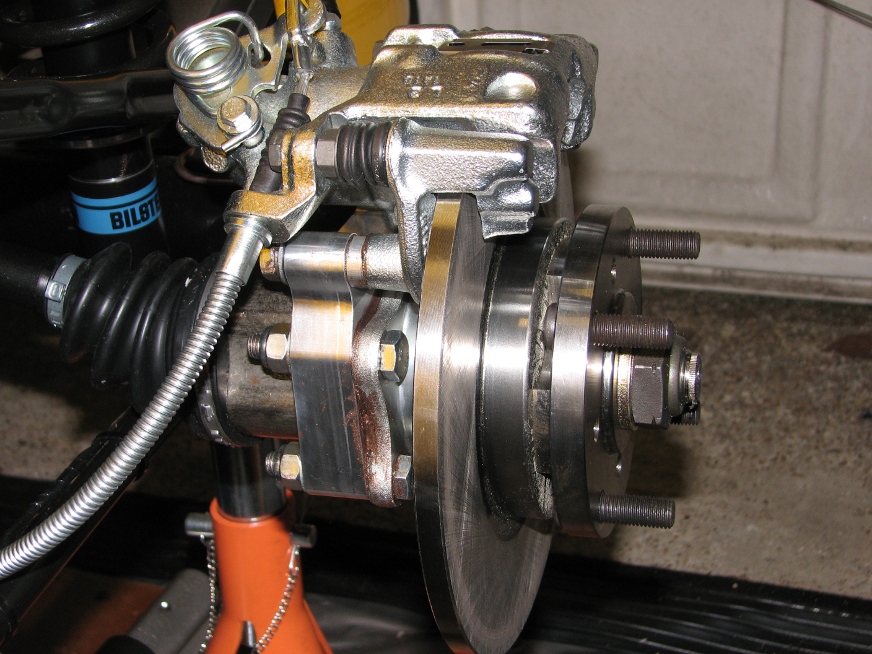
22/12/10-I have now finished the rear suspension. This shows the NS rear hub complete with caliper, disc
and the handbrake cable attached. I will fill the differential with oil next, then move on to preparing
the engine and gearbox.

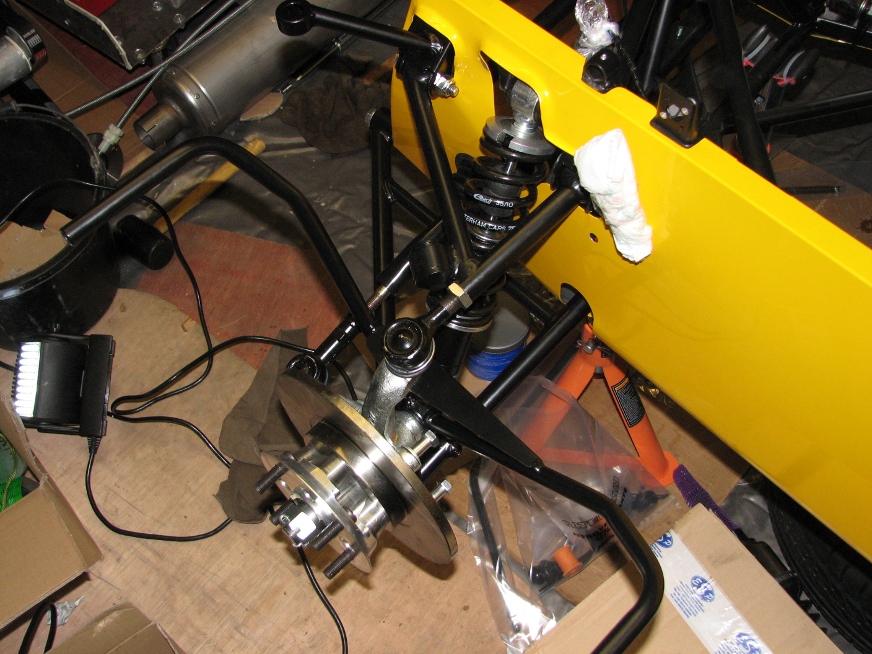
21/12/10-Here is a view below the rear suspension showing the A frame. The suspension bushes aren't torqued
up until after the car is on it's wheels with the engine fitted, so the suspension is at the correct level.

21/12/10-This photo shows the near side driveshaft fitted. The OS shaft was fine, but the NS would not go
into the diff fully. I'm not sure why, but several hours of using various techniques failed. I phoned Caterham
yesterday morning, and this morning a replacement shaft arrived by courier! The replacement slotted in
without any effort.
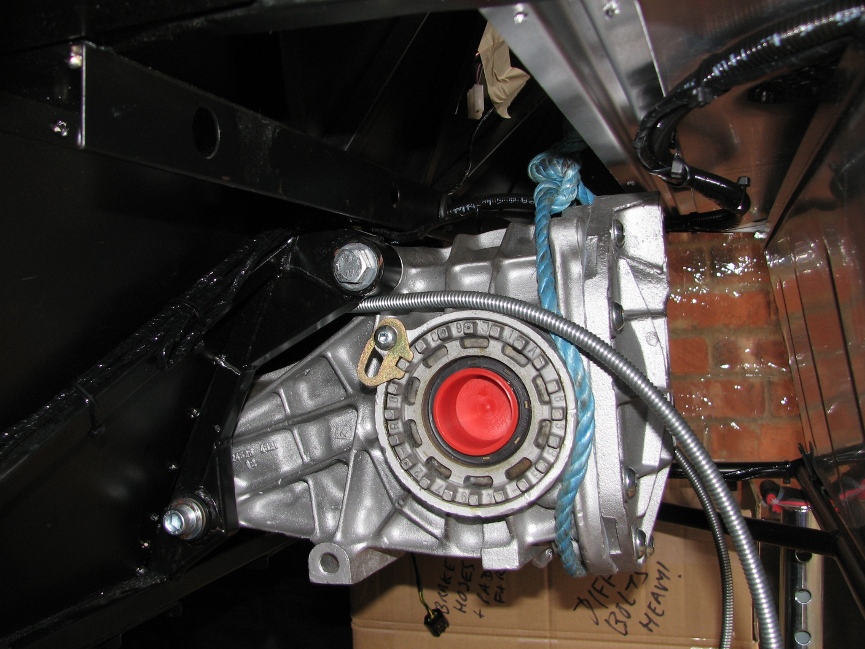
12/12/10-I'd heard fitting the differential was tricky, and they were right. Here it is in place after
about 4 hours work. The trick is to locate the top temporarily with a bar, and to locate the lower
bolts, taking care to centralise the diff using lots of washers. It can be up to 2mm to one side
I'm pleased to say mine is in the middle. The long top bolt that had to be bevelled at the end and
drifted into place with some timber and a 21/2 pound club hammer. I just hope I don't have to disturb
it for a long time.
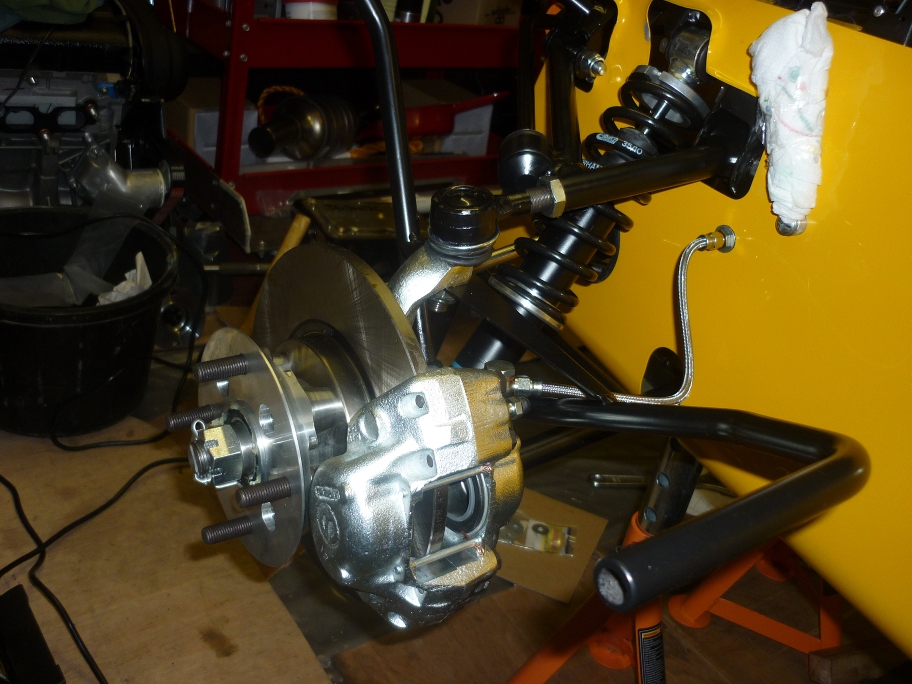
11/12/10-The braided brake hose has been fitted here. The front suspension is now complete apart from brake
pads. I'll fit them after doing the rear suspension, beacuse I'll have to clean the protective
coating off the discs first. The anti-roll bar went on surprisingly easily, I've heard people have
had trouble getting the ends into the wishbone cups. The rubber covers look quite neat with the cable
ties hidden underneath.
7/12/10-The upright has been installed now. The top shock absorber mounting bolt is very difficult
to install. The manual says gently push the alloy inwards to remove/replace the bolt.
I found that I had to bend the alloy skin with a wooden block to make the job even possible.
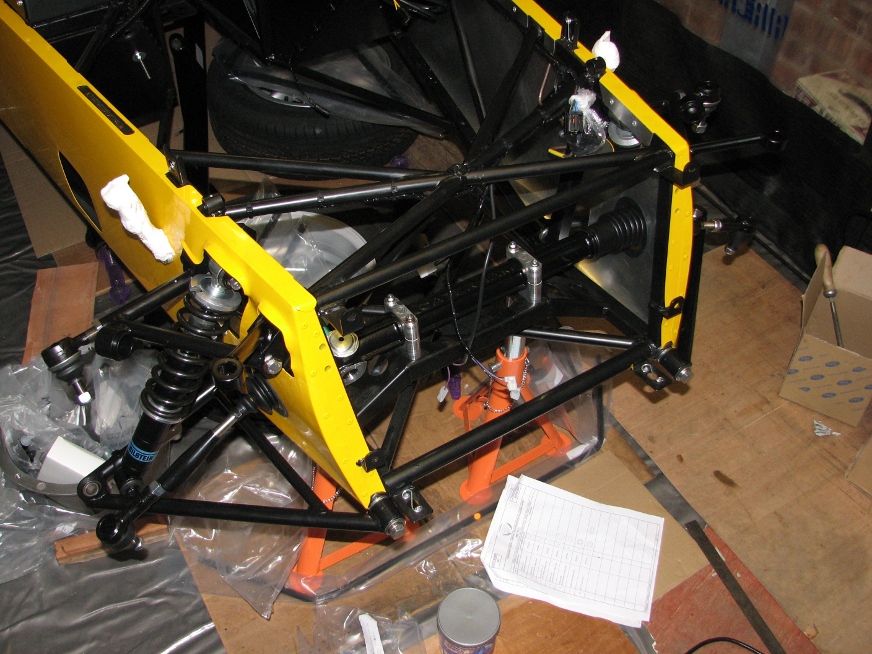
5/12/10-The wishbones and dampers have been installed. The wishbone bolts have to be tightened with
a torque wrench with the wishbones horizontal, because access is very difficult later and the
bushes should be in a relaxed position when the car is on its wheels.
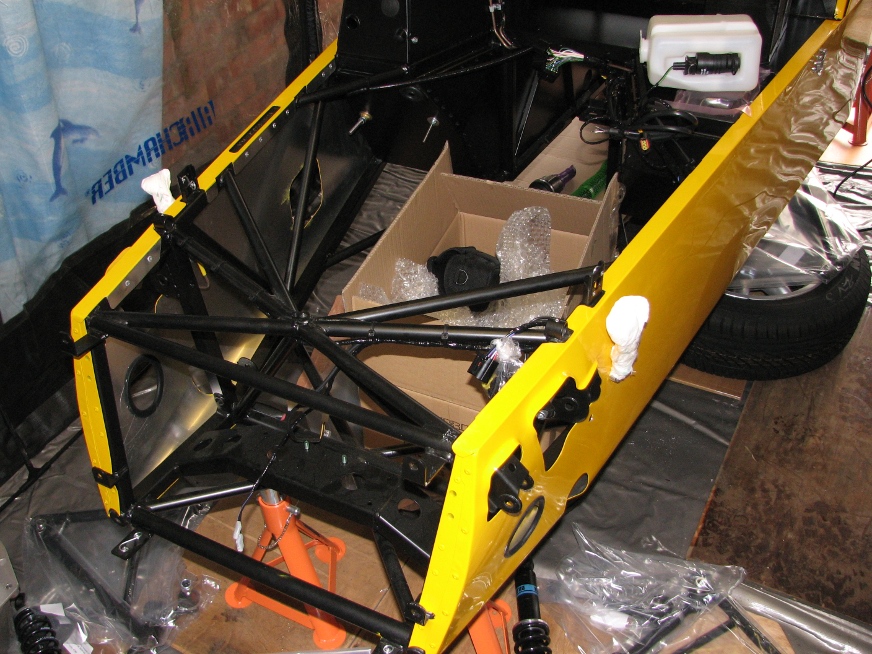
4/12/10-Here is the chassis with bonnet removed, ready to start the front suspension.

29/11/10-After a six month wait the car finally arrives, just before we had 12 inches of snow!
Sarah arrived home just in time to see us unload the car. We unloaded very quickly and just dumped
the large pieces in the garage and lots of boxes went into the lounge and dining room. I moved the
nosecone, wings, bonnet and seats into the loft to keep them safe.
Home