Please note: the photos below do not all show the same billet.
Pattern welding has been used for a very long time. The Vikings certainly mastered the process and made some sword blades that are very difficult to replicate even with all the modern tools available now.
Originally, the smiths had poor quality steel, and iron to work with. The iron was soft but tough, and the steel was harder, but more brittle. By combining the two materials a superior weapon could be produced. As a side effect beautiful patterns were visible in the surface of the steel.
With modern steels, there is no need to use pattern welding, but the process can still be used to make attractive, unique blades and is also great fun to do.
The first stage is to get two types of steel, ideally these should both be hardenable tool steels but they need to be different enough to see the pattern. In this case I have shown CS70 (a plain 0.7% carbon steel - the five pieces below) and 15n20 (a similar carbon steel with a high nickel content - the four pieces below).
The steel strips need to be held tightly together, so they can be arc welded into stack called a billet. it is also a good idea to weld on a handle as you need to be able to hold it securely.
The steel is heated to red heat, and then borax is sprinkled on as a flux. The most important action of the flux is to keep oxygen away from the steel, to keep the metal clean and free of oxides (known as scale).
The billet is heated to bright orange/yellow in colour and the flux can be seem to be bubbling and moving rapidly over the surface. At this point the surfaces are slightly molten, and the billet is quickly taken to the anvil and hit with a hammer. If everything is right the layers will weld together. With a hand hammer it is only possible to weld a couple of″ at a time.
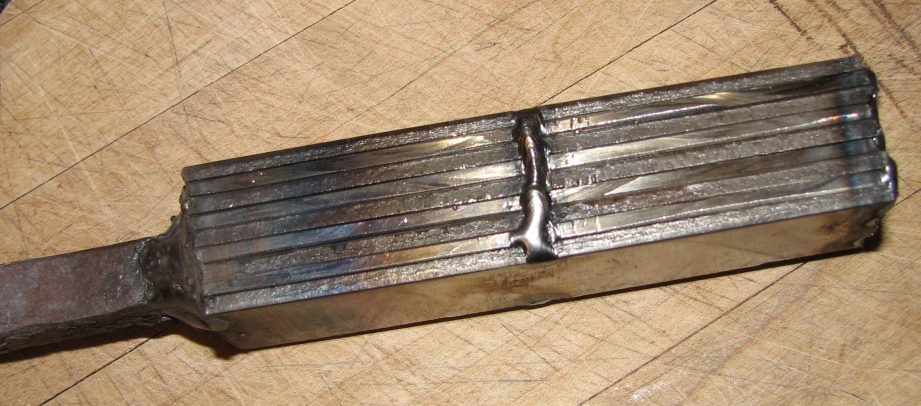
Once welded the billet will look like this image below:

Initially I start with 9 layers, and to increase the layer count to vary the pattern, I draw out the billet to double its original length. I then cut ¾ the way through the middle of the bar with a chisel, and fold it back upon itself. The bar is refluxed and reheated to welding temperature and welded together. This procedure can be repeated indefinitely, but each time more steel is burned off and more layers than 300 will give a subtle pattern. More than 1000 can’t be seen.
Below is a cooled bar with about seventy layers:

The next stage is to maniplulate the layers to produce the required pattern. There are hundreds of ways to do this by cutting, grinding, drilling, and combining bars. Here I have twisted the billet:

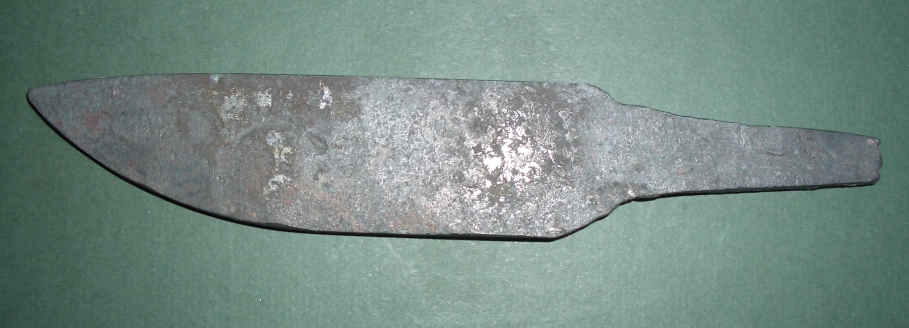
The bar would then be squared up, and then forged to the desired shape, prior to grinding, and heat treating. Below is a knife forging straight from the forge: